Dental Implant Preparation and Surgery: The Ultimate Patient Guide
What You Need to Know About Dental Implant Preparation (Before Reading Further)
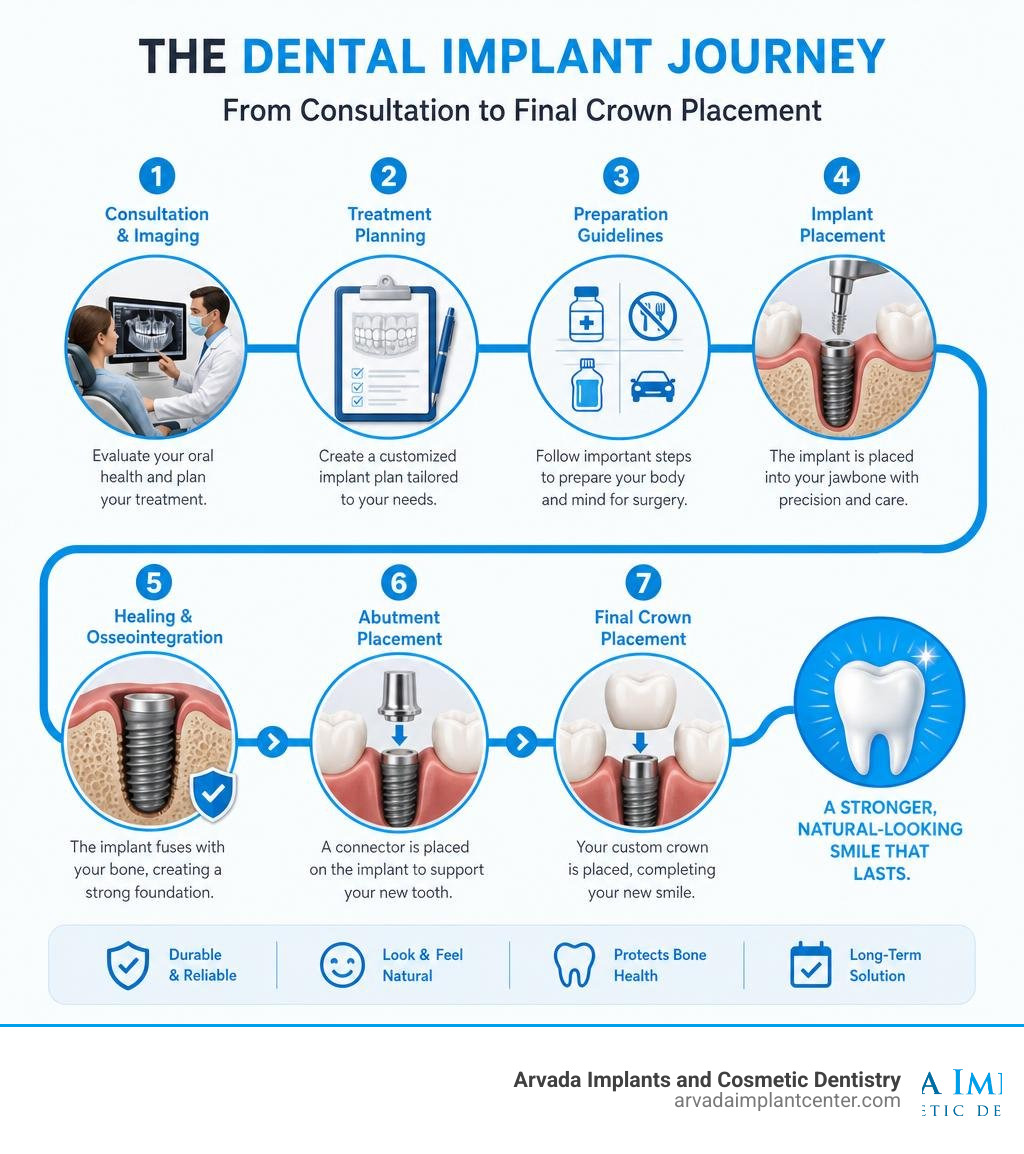
Dental implant preparation involves several key steps you should know before your surgery date:
Consultation and imaging — Your dentist takes X-rays or 3D scans to assess your bone density and jaw health.
Medical history review — Share all medications, supplements, and health conditions with your provider.
Medication adjustments — Some medications may need to be paused before surgery.
Fasting — If sedation is used, you'll typically need to avoid food and drink for 4–12 hours beforehand.
Antibacterial rinse — Rinsing with chlorhexidine mouthwash before surgery reduces infection risk.
Arrange a driver — You won't be able to drive yourself home after sedation.
Set up your recovery space — Stock soft foods, medications, and a comfortable rest area before your appointment.
Having gaps in your smile does more than affect how you look — it can make eating difficult, change how you speak, and quietly chip away at your confidence over time. Dental implants are one of the most effective and lasting solutions available today, with dental providers placing over 3 million implants every year in the United States alone. But the surgery itself is only part of the story. How well you prepare beforehand plays a huge role in how smoothly everything goes and how well you heal.
This guide is designed to walk you through every stage — from your very first consultation to the moment your new smile is fully restored — in plain, simple language. No confusing jargon, no unnecessary fear.
I'm Dr. Tariq Sawaqed, CEO of Arvada Implants and Cosmetic Dentistry, and with over 20 years of experience in dental implant preparation and placement, I've guided thousands of patients through this exact process using advanced 3D imaging and guided implant planning. My goal here is to give you the clear, honest information you need to feel confident walking into your procedure.
Understanding Dental Implants: What They Are and How They Work
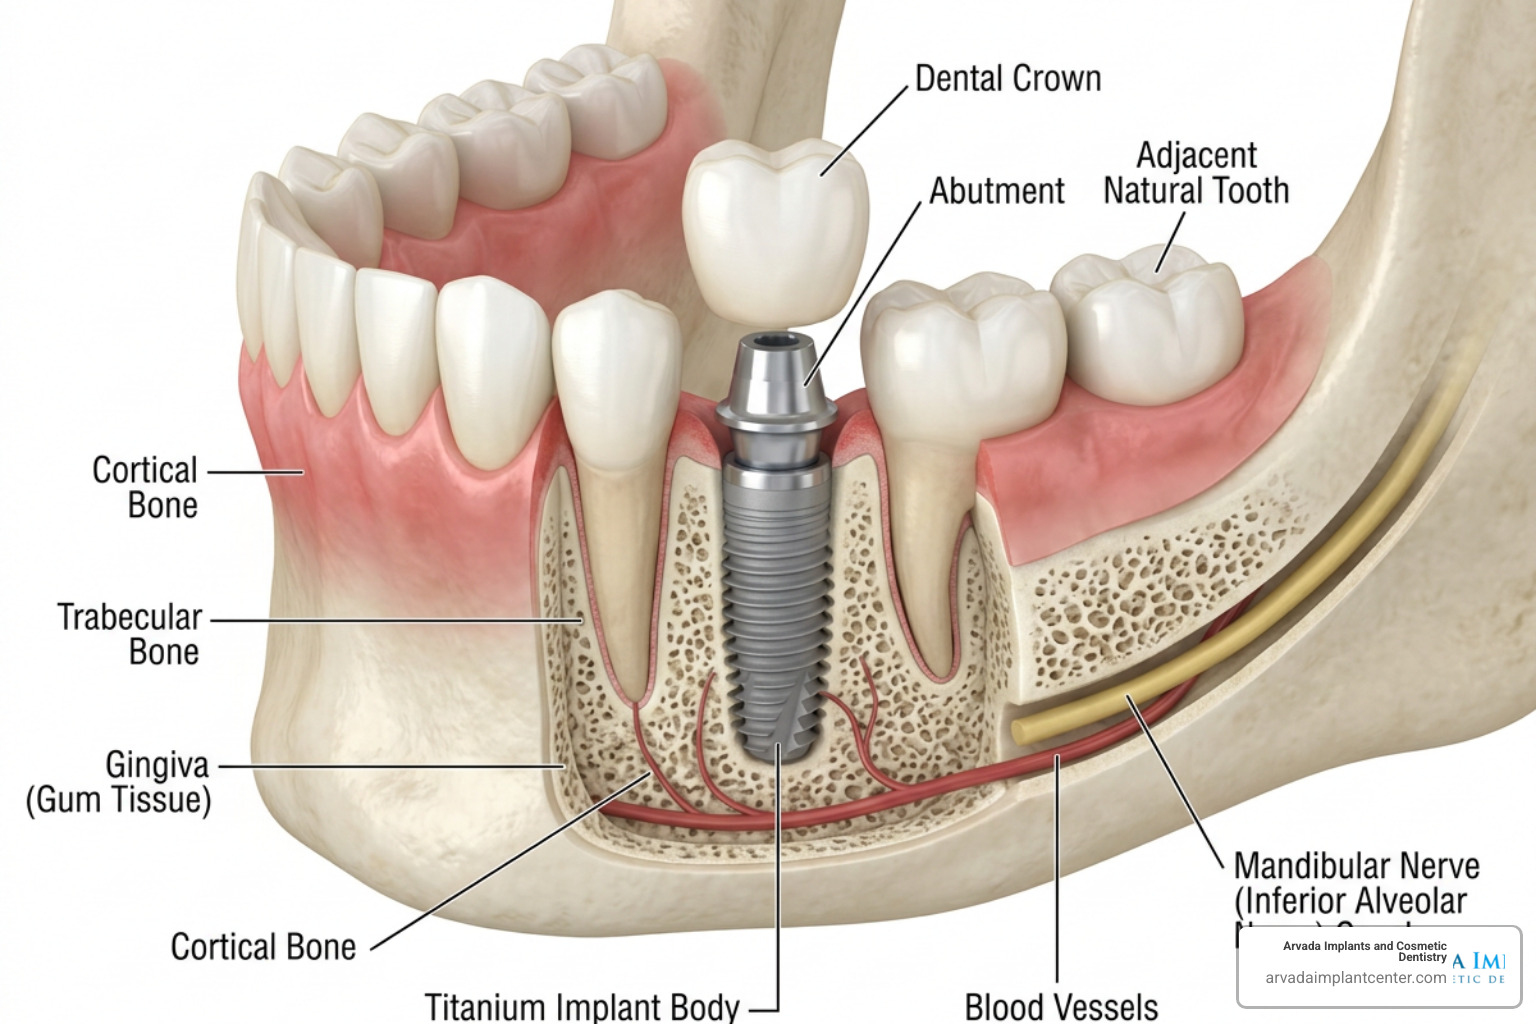
At its core, a dental implant is a high-tech replacement for a missing tooth. Unlike traditional alternatives that sit on top of the gums, implants are surgically anchored directly into your jawbone. This unique design mimics the structure of a natural tooth, offering unmatched stability and preventing the bone loss that naturally occurs when a tooth is lost.
To understand how they work, it helps to look at the three main components that make up a complete implant:
The Titanium Post: This is a small, screw-like post that acts as the new "root" for your tooth. Titanium is highly biocompatible, meaning your body accepts it readily. Through a biological miracle called osseointegration, your natural jawbone actually fuses with this post over several months, locking it permanently into place.
The Abutment: Once the post is securely integrated, we attach a small connector piece called an abutment. This piece sits just above the gumline and serves as the anchor for your new tooth.
The Prosthetic Crown: This is the custom-made, visible tooth that sits on top. Crafted to match the exact shape, size, and color of your natural teeth, it blends seamlessly into your smile.
When it comes to selecting the implant hardware itself, we utilize world-class options like the Straumann® Dental Implant System to ensure our patients benefit from the latest advancements in implant surface technology, which can significantly accelerate healing times. We also look to technical standards outlined in the XiVE Surgical manual and the Implant System manual to maintain the highest clinical standards.
To see how Dental Implants compare to other tooth replacement options, take a look at this breakdown:
Feature Dental Implants Dental Bridges Traditional Dentures Average Lifespan Lifetime (with proper care) 10 to 15 years 5 to 7 years Bone Preservation Yes, actively prevents bone loss No, bone can shrink underneath No, can accelerate bone loss Impact on Neighboring Teeth None Requires grinding adjacent teeth Can put stress on supporting teeth Stability & Comfort High (feels like a natural tooth) Moderate Variable (can slip or click) Maintenance Brushing and flossing as normal Special flossing tools required Must be removed and soaked
Traditional vs. Advanced Implant Options
No two smiles are identical, which is why we offer a range of specialized implant solutions depending on your unique needs.
If you are only missing a single tooth, a single implant post topped with a custom crown is the perfect way to address One Missing Tooth without altering the healthy teeth on either side. If you have several gaps in a row, we can place a couple of implants to support a custom bridge, resolving Multiple Missing Teeth efficiently.
For patients who are missing an entire arch of teeth—or whose remaining teeth are no longer salvageable—we offer advanced full-arch restorations. The All On 4 system is a approach that uses just four strategically angled titanium implants to support a complete, permanent bridge of beautiful new teeth. By tilting the rear implants up to 45 degrees, we can maximize contact with your existing bone, often eliminating the need for complex bone grafts.
In exceptionally rare cases where severe bone loss in the upper jaw makes standard implants impossible, zygomatic implants can be used. These longer, specialized implants anchor securely into the sturdy cheekbone (zygoma) rather than the jawbone, providing a solid foundation for a beautiful new set of teeth.
Who is a Candidate for Dental Implants?
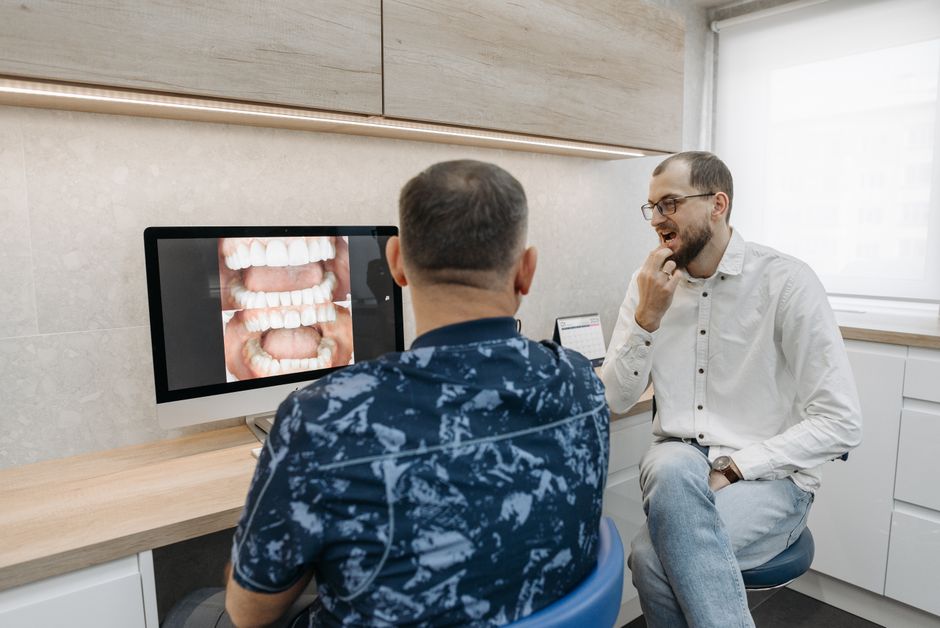
Most adults who are in good general health make excellent candidates for dental implants. However, because the procedure relies on a surgical connection with your body's tissues, there are a few essential criteria we look for during your initial evaluation:
Sufficient Bone Density: The jawbone must be strong and thick enough to hold the titanium post securely.
Healthy Gums: Active periodontal (gum) disease can interfere with healing and lead to implant failure, so any infections must be treated before we begin.
Good Overall Health: Chronic conditions that affect healing, such as uncontrolled diabetes or certain autoimmune conditions, require careful management and coordination with your primary care physician.
Age Considerations: Dental implants should only be placed once the jawbone has finished growing. This means we typically wait until a patient is at least 18 years old. There is, however, no upper age limit—we have helped many patients in their 80s and 90s reclaim their smiles!
Evaluating Jawbone Density and Health
When a tooth is lost, the surrounding jawbone no longer receives the chewing stimulation it needs to stay healthy. As a result, the bone can begin to resorb, or shrink, over time. If you have been missing teeth for a while, or if a severe infection damaged the socket, you might not have enough bone to support an implant right away.
Fortunately, modern dental science has excellent solutions for this. If your jawbone is too thin or soft, we can perform a bone graft to rebuild the foundation. In the upper jaw, the sinus cavities sit directly above your back teeth. If the bone there is too thin, the implant could accidentally poke into the sinus. To prevent this, we perform a sinus lift, gently lifting the sinus membrane and placing bone graft material underneath. If this is part of your plan, we will provide you with detailed Sinus Lift Home Care Instructions to ensure a safe, comfortable recovery.
For localized bone rebuilding, we utilize Guided Bone Regeneration (GBR), a technique where a protective membrane is placed over the bone graft to keep faster-growing gum tissues out, allowing the slower-growing bone cells the time they need to rebuild. You can read more about how this works in our guide on GBR in Dentistry.
Essential Steps for Dental Implant Preparation
The secret to a seamless surgical experience lies in meticulous dental implant preparation. This isn't a process you want to rush. By taking the right steps before your surgery date, you set yourself up for minimal discomfort and a rapid recovery.
We understand that investing in your smile is a major decision. That is why we work closely with you to navigate Insurance and Finance options, ensuring you understand exactly what to expect. We also offer flexible Payment Plans to make this life-changing care affordable and accessible.
Clinical Exams and Dental Implant Preparation
Your preparation journey begins with an in-depth clinical examination. During this visit, we gather the precise anatomical data needed to plan your surgery with sub-millimeter accuracy.
Using 3D CBCT (Cone Beam Computed Tomography) scans and advanced digital X-rays, we can visualize your jawbone, nerve pathways, and sinus cavities in three dimensions. This allows us to select the perfect implant length and diameter and pre-determine its exact placement angle long before you ever sit in the surgical chair. We also create diagnostic casts to evaluate how your upper and lower teeth meet.
If you are a new patient, you can speed up your first visit by filling out our New Patients Form online. For those interested in the deep science behind how we prepare the surgical site to preserve bone health, you can explore the clinical insights in this academic review on Dental Implant Site Preparation – A Review .
At-Home Dental Implant Preparation Guidelines
To ensure your body is in the best possible state for healing, we ask that you follow these simple at-home preparation steps:
Fasting Requirements: If you are receiving IV sedation or general anesthesia, you must not eat or drink anything (including water) for 4 to 12 hours before your procedure. If you are only receiving local anesthesia, we actually encourage you to eat a light, nutritious meal beforehand.
Antibacterial Mouthwash: Rinsing with a prescribed chlorhexidine mouthwash for 30 seconds before your appointment helps reduce the bacteria in your mouth, lowering the risk of post-operative infection.
Arrange Transportation: If you are undergoing any form of sedation, you must arrange for a responsible adult to drive you home and stay with you for a few hours while the medication wears off.
Set Up Your Recovery Space: Before you leave for the clinic, set up a comfortable resting area at home. Plump up some extra pillows to keep your head elevated, and make sure your kitchen is stocked with soft foods and plenty of hydrating liquids.
The Dental Implant Surgical Procedure Step-by-Step
It is completely normal to feel a little nervous before any surgical procedure. However, most patients are pleasantly surprised by how straightforward and comfortable the process actually is. Thanks to modern local anesthetics and customized sedation options, you should not feel any pain during the surgery.
For a comprehensive look at the entire timeline, you can read our overview of the Dental Implant Process Step by Step as well as the detailed surgical breakdown in Dental Implant Procedure Steps.
Tooth Extraction and Bone Grafting
If the tooth we are replacing is still in your mouth but is severely damaged or decayed, the first step is to gently extract it. We take great care to perform this extraction as gently as possible to preserve the surrounding bone walls.
In many cases, we will place a bone graft directly into the empty socket immediately after removing the tooth. This process, known as socket preservation, prevents the bone from collapsing and ensures a sturdy foundation for the future implant. If your treatment plan involves this step, make sure to read our guide on Tooth Extraction Aftercare to keep the extraction site healing beautifully.
Implant Placement and Osseointegration
Once the site is fully prepared and numb, the surgical placement begins:
Creating the Osteotomy: We make a small, gentle incision in the gum tissue to expose the bone. Using specialized, high-precision drills cooled with a continuous stream of sterile saline to prevent the bone from overheating, we create a small, precise channel (an osteotomy) in the bone.
Placing the Titanium Screw: The titanium implant is carefully threaded into the prepared channel. We monitor the insertion torque closely to ensure it achieves excellent primary stability—meaning it is locked tightly into place from day one.
Closing the Site: Depending on your specific plan, we will either place a small healing cap over the implant and close the gums around it (a one-stage procedure), or cover the implant entirely with the gum tissue and secure it with a few tiny stitches (a two-stage procedure).
The Osseointegration Phase: This is where the magic happens. Over the next 3 to 6 months, your jawbone will naturally grow around and fuse with the microscopic texture of the titanium post. During this healing timeline, you can wear a temporary, aesthetic tooth replacement so you never have to go without a smile.
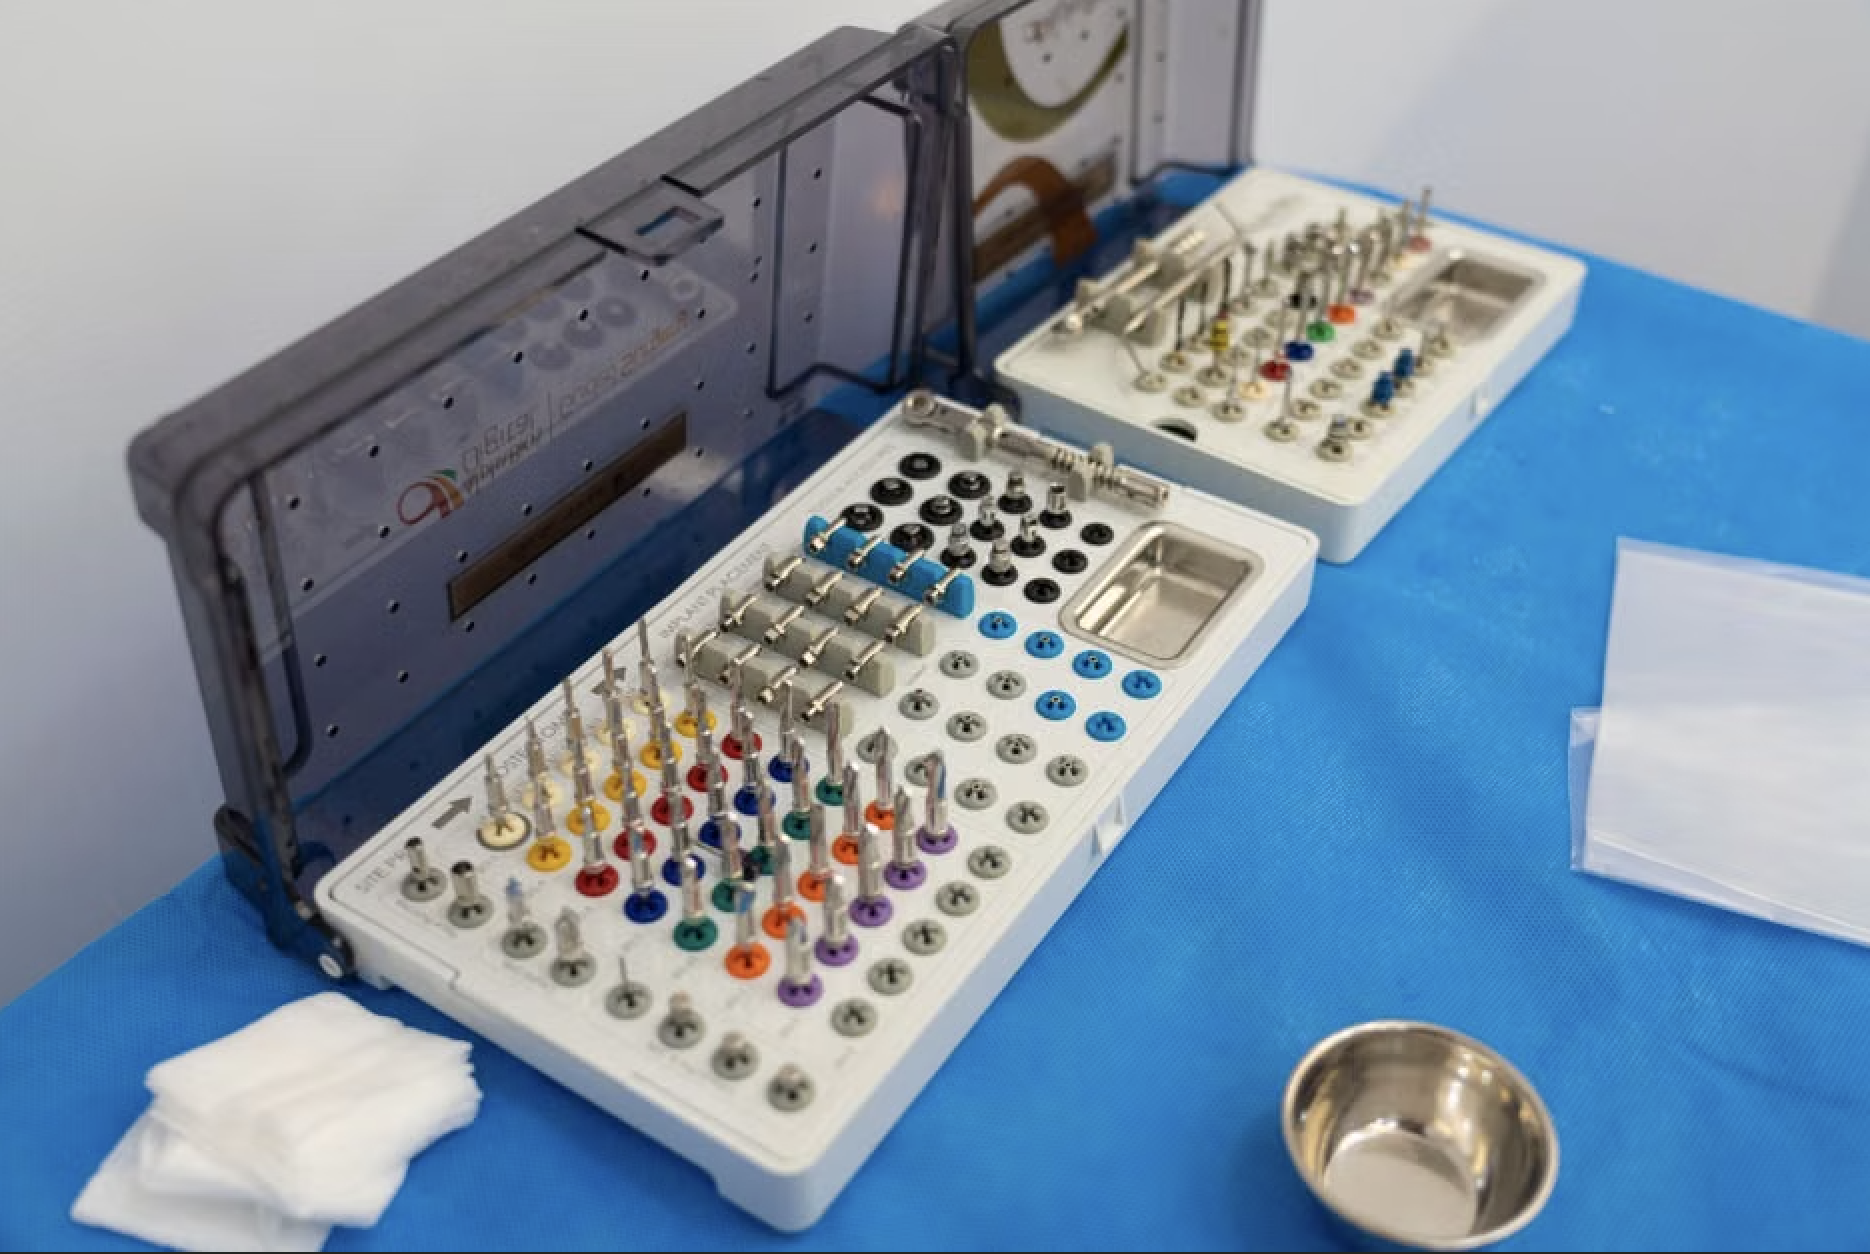
To learn more about the strict clinical guidelines we follow to ensure proper spacing and depth during placement, you can review the Basic Information on the Surgical Procedures manual.
Recovery and Post-Operative Care
What you do after your surgery is just as important as the preparation beforehand. Proper aftercare ensures that your body can focus its energy on healing and integrating the new implant without complications.
To help you navigate this period, we provide all our patients with comprehensive Implants Home Care Instructions.
Immediate Aftercare and Dietary Tips
During the first 24 to 48 hours after surgery, your main goals are to control minor swelling and protect the surgical site:
Manage Swelling: Apply a cold compress or ice pack wrapped in a cloth to the side of your face for 15 minutes on, 15 minutes off, during the first day. This works wonders to minimize swelling and bruising.
Keep Your Head Elevated: When resting or sleeping, use a couple of extra pillows to keep your head raised. This reduces blood pressure in your jaw, which significantly cuts down on throbbing and swelling. You can find more tips on this in our guide to Elevated Head Sleeping.
Eat a Soft Diet: For the first week, stick to soft, cool, or room-temperature foods that require zero chewing. Think nutrient-dense smoothies, creamy soups (not too hot!), yogurt, mashed potatoes, and protein shakes. Avoid using straws, as the suction can dislodge the blood clot and disrupt healing. For a complete list of ideas, check out our guide on the Best Recovery Foods.
Stay Hydrated: Drink plenty of water, but avoid alcohol and carbonated beverages, which can interfere with the early stages of healing.
Long-Term Maintenance and Longevity
Once the initial healing phase is complete and your permanent custom crown is attached, caring for your dental implant is incredibly simple. You treat it just like a natural tooth!
Brush twice a day with a soft-bristled toothbrush and floss daily. While the titanium implant itself cannot get cavities, the surrounding gum and bone tissue can still fall victim to periodontal disease if plaque is allowed to build up. This condition, known as peri-implantitis, is the leading cause of long-term implant failure.
With meticulous oral hygiene and regular dental checkups every six months, your dental implant can easily last a lifetime. While the custom porcelain crown on top may experience normal wear and tear and need to be replaced after 15 to 20 years, the titanium root underneath is designed to stay with you forever.
Frequently Asked Questions about Dental Implants
How painful is the dental implant procedure?
Most patients are pleasantly surprised to find that getting a dental implant involves very little discomfort. Because we use advanced local anesthetics to completely numb the area, you will not feel any pain during the surgery. After the numbing wears off, you may experience some mild soreness or a dull ache, similar to a mild tooth extraction. This is easily managed with over-the-counter pain relief or the medications we prescribe.
How long do dental implants last?
Dental implants are designed to be a permanent, lifetime solution. Because the titanium post fuses directly with your jawbone, it becomes a permanent part of your anatomy. As long as you maintain excellent oral hygiene and visit us regularly for cleanings, the implant itself should never need to be replaced.
When should I call my dentist after surgery?
While complications are incredibly rare, you should contact us immediately if you experience any of the following warning signs:
Severe, throbbing pain that is not relieved by your prescribed medications.
Heavy, continuous bleeding that does not slow down after biting on a clean gauze pad.
A fever developing more than 24 hours after your surgery.
Swelling that continues to worsen after the third day.
Any feeling of looseness or movement in the implant post itself.
Conclusion
Reclaiming a complete, confident smile is a journey, and proper preparation is the map that ensures you arrive there safely. By understanding the process, preparing your body, and following your post-operative care instructions, you can look forward to a smooth, comfortable experience and a lifetime of healthy smiles.
At Arvada Implants and Cosmetic Dentistry, we are proud to offer affordable, highly personalized treatments right here in Arvada, CO. We combine state-of-the-art 3D planning technology with custom-crafted restorations created in our dedicated lab to deliver unique, beautiful smiles that feel completely natural.
If you are ready to take the first step toward restoring your smile and your confidence, we invite you to Contact Us today to schedule your personalized consultation. For more information on what to expect if you need a tooth removed before your implant, review our Tooth Extraction Home Care Instructions. We look forward to guiding you every step of the way!